workshop-ai-100
Publish a Machine Learning Experiment with Microsoft Azure Machine Learning Studio
Machine Learning plays a big role in applications that leverage artificial intelligence.
Microsoft provides the Machine Learning Studio and Machine Learning Services to help you take advantage of pre-built models or create your own custom machine learning models.
In this tutorial, you will:
- Set up and use Microsoft Azure Machine Learning Studio
- Create a sample experiment
- Publish and deploy the experiment for consumption as a web service
- Test the web service
- View the published web service headers and sample code
Create a Machine Learning Studio Workspace
-
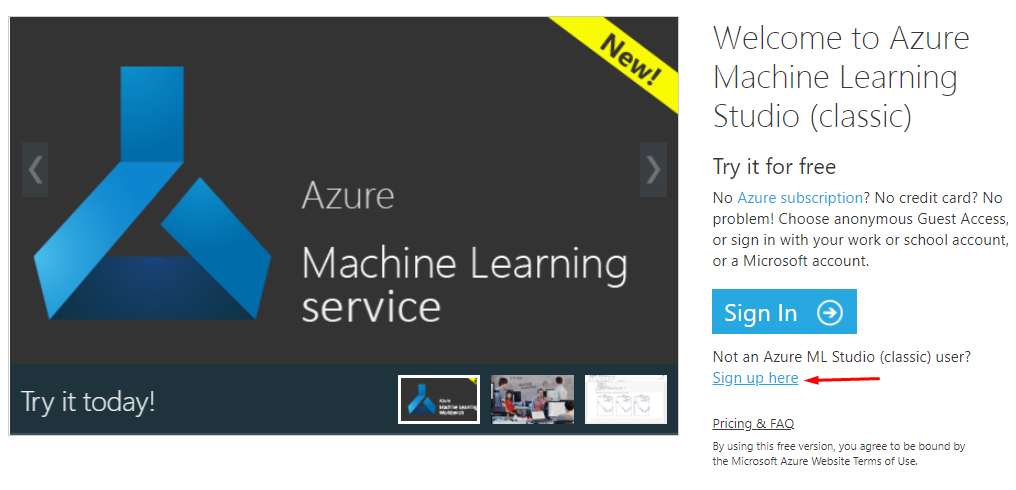
In a web browser, go to Machine Learning Studio
-
Under the Sign In button, select the Sign up here link.
-
Select the Free Workspace option.
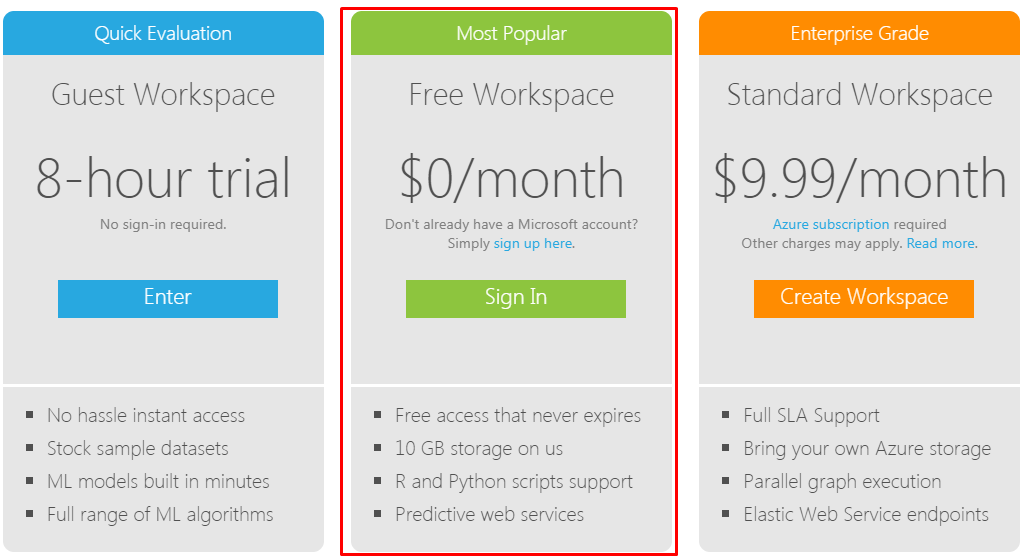
You now have a Machine Learning Studio Workspace and account.
Using an Azure account to create a Machine Learning Studio Workspace
You can use your Azure account to create and manage a Machine Learning Studio Workspace. Here’s how:
-
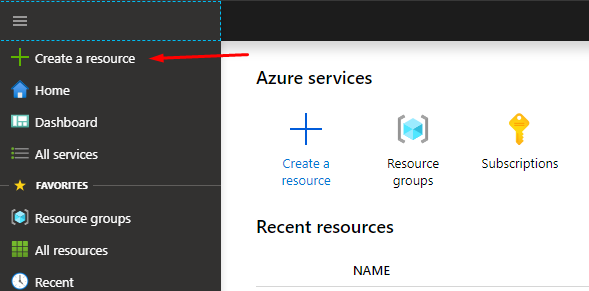
Sign in to the Azure portal.
-
On the dashboard, select Create a resource.
-
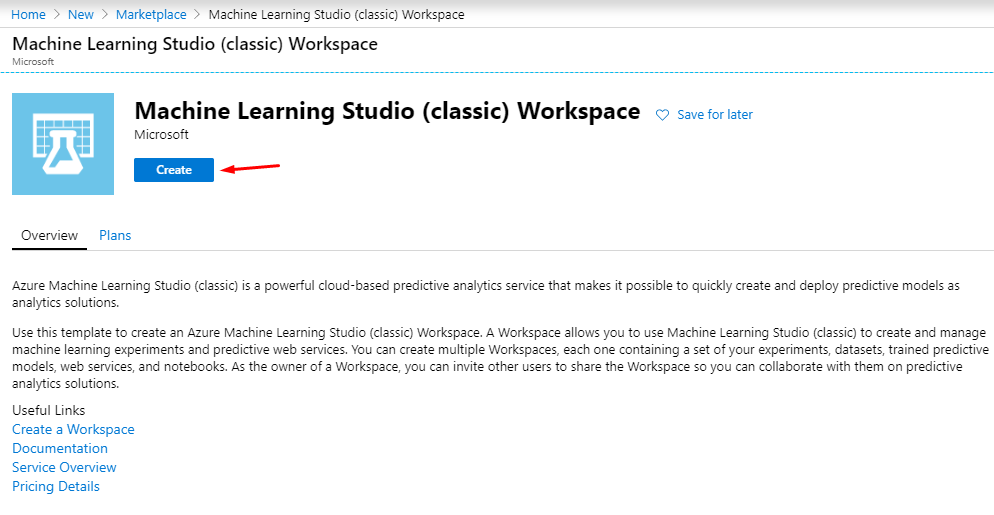
In the search bar, enter Machine Learning Studio (classic) Workspace.
-
Click on the Create button.
- Enter your workspace information, for instance:
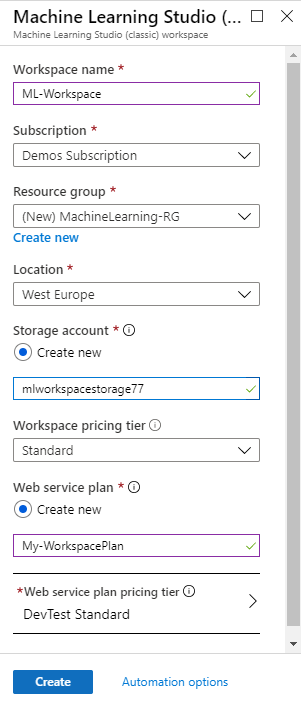
- Select Create and wait until the resource is created and deployed.
Now you can access your new Machine Learning Studio Workspace in one of two ways:
- By going to the resource in your Azure portal. On the Overview page, select Launch Machine Learning Studio (classic) to open the workspace in Machine Learning Studio.
- By signin in to the Machine Learning Studio portal. In the upper-right corner, select your region and workspace.
Create an experiment
We’ll start our Azure Machine Learning Studio experience by creating an experiment that uses a prebuilt dataset related to building energy considerations.
In this exercise, you’ll import a dataset into Machine Learning Studio. There you’ll experiment with it to publish a web service. This simple experiment shows how to create a machine learning model that you can publish and consume as a web service.
To import a dataset into Machine Learning Studio:
-
Download and extract the Building Data.zip file. This is the dataset.
-
Go to the Machine Learning Studio portal.
-
Sign in.
-
On the left navigation bar of Machine Learning Studio, select the Datasets icon.
-
In the lower-left corner, select the New button to upload the dataset.
-
Select DataSet > From Local File.
-
Select Choose File and then select the file you just downloaded.
-
In the lower-right corner, select the check mark to upload the dataset.
-
Verify that Building Data.csv is listed as a dataset.
-
In Machine Learning Studio, select the Experiments icon.
-
Select New > Experiment > Blank Experiment.
-
Select Saved Datasets > My Datasets > Building Data.csv.
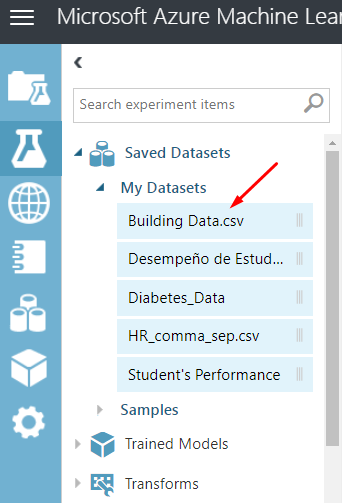
- Drag this dataset onto the designer surface.
Build the experiment
Now let’s build and run the experiment.
-
Expand Data Transformation > Sample and Split.
-
Drag a Split Data operation onto the designer surface.
-
On the right, set the fraction of rows in the first output dataset to 0.7 to split the data at 70/30.
-
Connect the dataset to the Split Data operation by dragging the dataset handle to the Split Data operation.

-
On the left, expand Machine Learning > Initialize Model > Regression.
-
Drag the Decision Forest Regression entry onto the designer surface.
-
On the left, expand the Score subcategory and locate Score Model.
-
Drag the Score Model operation onto the designer.
-
On the left, expand Train and drag a Train Model operation onto the designer.
-
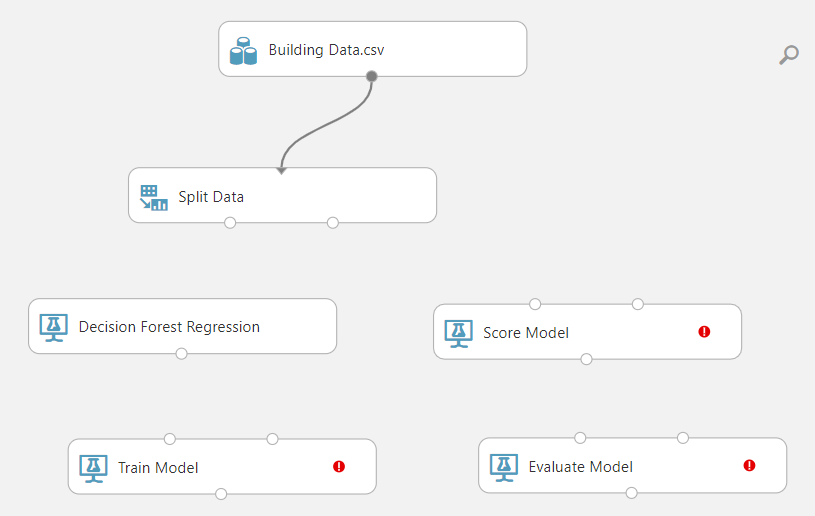
On the left, expand the Evaluate subcategory of Machine Learning and drag an Evaluate Model operation onto the designer.
Your experiment window should now look like this:
-
Connect output 1 of the Split Data operation to the Train Model operation.
-
Select the Train Model operation.
-
On the right, select Launch Column Selector.
-
Select the With Rules entry. Then click inside the empty column list and select the Wall Area column name.
-
Select the check mark to accept the selection.
-
Connect the Decision Forest Regression operation to the remaining input of the Train Model operation.
-
Connect the second output of the Split Data operation to the Score Model operation.
-
Connect the output of the Score Model operation to the left input of the Evaluate Model operation.
-
Connect the output of the Train Model operation to the remaining Score Model input. Your experiment should now look like this:

-
At the bottom of the designer window, run the experiment by selecting the Run button.
-
Make sure all of the operation boxes show green check marks and that the upper-right corner of the designer displays Finished running with a green check mark.
-
Save your experiment as Energy Efficiency Regression.
At this point, feel free to look at the data in the CSV file to figure out what your experiment is acting on.
Prepare and deploy the experiment
You’ve created and trained an experiment in Azure Machine Learning Studio. Now it’s time to publish it as a web service that clients can access.
Let’s prepare and publish your experiment as a web service and then evaluate the results.
-
On the left navigation bar of Machine Learning Studio, select the Experiments icon.
-
Select your completed Energy Efficiency Regression experiment to open it.
-
Depending on the state of the web service, you might not have to run your experiment again. If the upper-right corner of the designer displays Finished running, and your stages show green check marks, you’re ready for the next step. If not, select the Run button.
Set up the web service
-
After the energy-efficiency experiment has run, at the bottom of the designer, hover over the Set Up Web Service button.
-
Select Predictive Web Service Recommended. If the Predictive Web Service option is not available, run your experiment again. Check for the Finished running note.
-
Verify that the Predictive experiment tab opens. The designer should show a web service input and web service output operation.
-
Select the Run button.
-
Verify successful completion by looking for a green check mark in the Score Model operation. Also look for a Finished running note in the upper-right corner.
Deploy the web service
- Select the Deploy Web Service button. Machine Learning Studio creates the web service and opens a new window that indicates success. You’ll notice an API key for your web service. Applications will use this key to access the web service.
Test the web service
Now that the web service is deployed, let’s test it to see the output results.
-
Next to the Request/Response option, select the Test button to open the data entry dialog box.
-
In the data entry dialog box, enter the following values from the training model data:
Wall area: 296 Roof area: 110.25 Overall height: 7 Glazing area: 0 Heating load: 15.55
-
In the lower-right corner, select the check mark.
-
You’ll see the output on the status bar, just above the New button at the bottom of the Machine Learning Studio window.
-
To see an example of the returned JSON code, select the Details button. You’ll see the values you entered and two additional values. These are the model’s evaluations of the energy efficiency for the values you entered.
View headers and sample code
Clients consume your experiment’s web service by using RESTful API calls. Azure Machine Learning Studio gives you some sample header information that shows how to call the web service.
View the request and response headers
-
Under API Help Page for the Default Endpoint, select the Request/Response link. Machine Learning Studio opens another browser tab or window to show the API documentation for this web service.
-
Scroll down to Request Headers and Request Body to get an idea of how the request will be formed. This request will be sent to the web service for evaluation. It’s in JSON format.
-
Scroll down more and evaluate the Response Headers and Response Body sample. This section shows the format of the data that will be returned along with a sample JSON response. Use this sample to understand how to parse the JSON code for the data you want to use in your application.
-
Scroll down more to find information about the input and output parameters. These parameters include the expected names and data types. If you create a class to represent the returned information, you can use these parameters to create the proper data types for your member variables. The last two returned items map a Scored Label Mean value to a Scored Label Standard Deviation value.
Evaluate the sample code
You’ll use the sample code as a reference or basis to create a client application that will consume the web service for the experiment. Review the code to see how to create the request and consume the response in your app.
The Sample Code entry contains samples in C#, Python, and R.
To view it:
-
Scroll all the way to the bottom of the web service API documentation window.
-
Select the tab of the language you’re most familiar with. Then review the code to see what it’s doing.
-
Notice the placeholder for the API key. You’ll need to replace the value abc123 with a valid API key.